Installing the Connectivity Software Visual Stduio Extension
The Connectivity Software Visual Studio Extension is not installed by default. Use the following procedure to install it:
- In the Launcher application (at the root), double-click "Install Visual Studio Extension". The VSIX Installer will start.
- When presented with the dialog that asks for confirmation to install the Connectivity Studio extension, press the Install button.
- When the installation is complete and the corresponding dialog is displayed, press Close.
Alternatively, you can:
- Make sure that Visual Studio is closed.
- Use File Explorer to find the VisualStudio folder under the Connectivity Software installation directory.
- Locate the OpcLabs.ConnectivityStudioVsix.vsix file, and double-click on it.
- Follow the instructions given by the VSIX Installer .
Symptom: QuickOPC toolkit items do not appear in the Toolbox
There should be tabs labeled "QuickOPC Components", "Connectivity Software Windows Forms", "OPC Wizard Components" etc. in the Visual Studio Toolbox, and contain the toolbox items described in this documentation (depending on which products were installed). The actual items displayed depend on the type of project and designer. In some cases, you may not have the QuickOPC tabs or any Connectivity Software items in the Toolbox, or the set of items might be incomplete.
- Check that you are designing a supported project and item - such as Windows Forms form or control, or a WPF window. Make sure you have a document open in the editor that allows placing components to it – such as a Windows form (alternatively, “” can be selected in the Toolbox).
- Verify that your project (in its Properties) is targeting a supported version of .NET Framework. If not, retarget the project to a supported version. Commonly, if you do not see the right components, it means that your project is not targeting the .NET Framework version 4.7.2 or later.
- Perform a “” command (right-click in the toolbox area first), and restart Visual Studio.
- Check if the Connectivity Software Visual Studio extension is installed. To do so, perform -> , and switch to the Installed tab. There should be the Connectivity Software extension listed as installed, similarly as on the following picture:
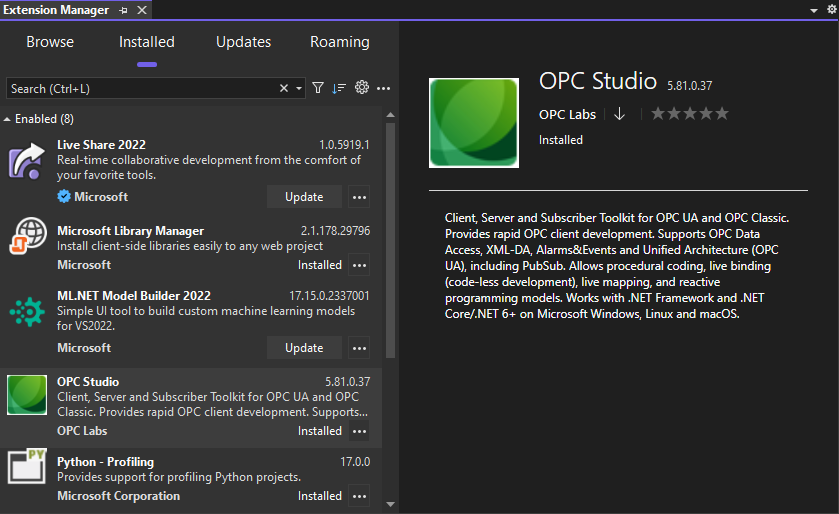
- If the extension is installed: Verify that the version of the extension precisely matches the version of Connectivity Software components you are developing with. If not, uninstall the extension (this will require exiting the Visual Studio).
- If the extension is not installed at this point: Install it using the procedure described earlier in the article.
Uninstalling the Connectivity Software Visual Studio extension
From inside Visual Studio, the Connectivity Software Visual Studio extension can be uninstalled using the following procedure:
- In Visual Studio, perform -> , and switch to the Installed tab.
- Find the "Connectivity Software" extension. Select it.
- Press the Uninstall button next to it.
- Exit Visual Studio.
The extension can also be uninstalled externally (e.g. in case Visual Studio has problems starting). To do, locate the VSIXInstaller utility - the typical path might be similar to "C:\Program Files\Microsoft Visual Studio\18\Community\Common7\IDE". Then, in the command prompt, run the following command:
VSIXInstaller.exe /uninstall:OpcLabs.ConnectivityStudio.8cc338a8-b1bc-4215-ad48-c383345f9fa1
See Also